Author: trinipragmatist

#9 – Repurposed Eats: Brazil Nut Dumplings

After reading #’s 7 & 8 the content of this entry may be predictable.  In the Caribbean dumplings are a common site on the dinner table to go with stews or in soups and there are three main kinds – wheat flour, cornmeal, and cassava.  For the latter two, wheat flour is still used for the traditional dumpling texture and the cornmeal and/or cassava added for a change of flavour.  The same procedure for making them can done with your nut milk pulp as well.  Simply mix the pulp with wheat flour at a 1:2 ratio with a pinch of sea salt (or two or 3 pinches depending on how much you are making):

b4dumpling

Be careful with adding water because the pulp will already have some water in it.  The dough should be stiff after forming it into a ball and kneading (you can of course just add more flour if you accidentally put too much water).  Tear off pieces of your preferred dumpling size, mold them into your preferred dumpling shape, (I like making mine into “fingers”), and they are ready to boil.

afterdumpling

#8 – Brazil Nut Milk*

In recent years it has been great to see that not only are dairy milk alternatives becoming more accessible, but more types of them are emerging as well.  I most prefer the nut-based varieties and judging from what I’ve been seeing in the supermarket lately, I’m not the only one.  I think almond milk might now be either tied with or coming in at close second-place behind soy among consumers in the category.

One I haven’t seen at all though is brazil nut milk (at this point I wouldn’t be surprised if it indeed is out there and I’ve just not come across it yet).  That being the case, I thought to try making it myself – which I actually do with milk 99% of the time because just like anything else, fresh & home-made is always better than off-the-shelf from the grocery; I only make an exception when I catch those I like in the store at a super sale price.  Whereas the nut itself has a similar look and texture to almonds, I went with the same procedure for making it.  The end product turned out great; tastes quite similar to almond milk, a tad bit more savory perhaps.  I now alternate making almond/brazil nut milks whenever I’m in the mood for some… basically just going by whichever is available and less expensive where I get them from at that time.

The process is quite easy.  Just soak the nuts overnight

photo 4

Put them in a blender with water at a 1:2 ratio

photo 3

Blend thirty seconds – one minute depending on the strength of your blender

photo 2

Strain

photo 1

This is my method for making all dairy milk alternatives.

*This will be a three-part post.  I won’t give any details yet about the upcoming two other sections so-as to avoid spoiling the mild suspense over them which may have some duality in being bad since we’re talking about food.

#7 – Repurposed Eats: Vegetable Broth

A common complaint and misconception about eating vegan by those who are not one of us is that it is expensive, theoretically more-so than what they usually consume.  That however is dependent on what & where you eat, plus if you often do your own cooking (which ironically, most people I hear this from do not).  Making your own cuisine at home is the best way to see the myth expelled and in addition to that, there are methods for stretching veg eats beyond how the average person may think to do so.

If one chooses to embrace the lifestyle of healthy habits in their kitchen to a point that they continuously matriculate with the processes, there likely may come a time when a vegetable juicer is added to the list of tools in that room.  Once it is put to use, what is likely the most popular vegetable juice, carrot, may be made.  That is what happened to me and I now have a favourite vegetable juice combo – carrot, celery, ginger.  One day I realized that these three are also common ingredients in packaged vegetable broth & bullion and the mental light bulb went on to experiment trying to make my own broth with the pulp from the juicer.

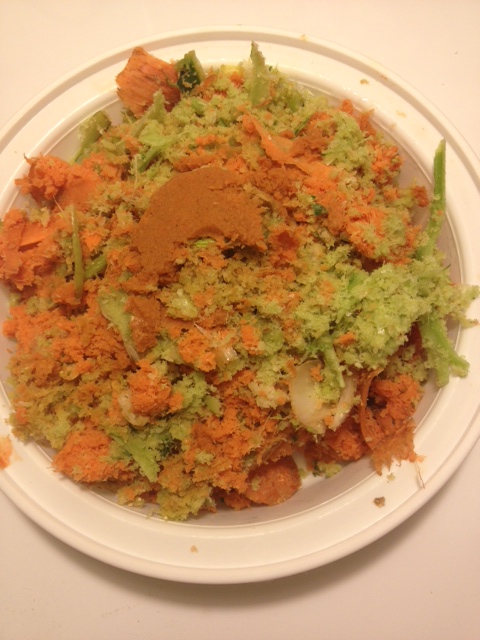
photo 1 (4)

I added it along with the two other prominent ingredients, garlic & onion (whole…yet to find an appetite for garlic or onion juice), to a pot with water at a ratio of 1:2, boiled it and allowed it to steep overnight.

photo 2 (5)

The end result was great; I strained it into containers and froze them.

photo 3 (2)I now make it on a regular basis.  Notice how I use different size containers; I can pull a big one out the freezer for a big pot or small one for a small pot.  It makes a fantastic substitute for dishes calling for chicken or beef broth and making it with scraps one would usually just throw away seems to make it taste even better especially considering the savings over buying pre-made vegetable broth from the grocery store.  Combining carrots, celery, and onion like this is also a mixture that the alleged culinary champs, the French, use so often that they have given it a name – mirepoix.

#6 – Jamaica’s National Dish

Achieving the smell and taste of fish (salt-water breeds) in foods is one of the easiest vegan tricks to perform; simply replace the fish with seaweed.  Doing so with Jamaica’s National Dish – Ackee & Saltfish – works extremely well and considering how easy it is to make, I encourage everyone familiar with the usual way of preparing it to try it this way to determine if it is just as appetizing if not more so.

Ingredients:

19 oz. ackee (BKA 1 can)

1/2 cup tomato

1/4 cup onion or scallions

2 TBS olive oil

1 TBS garlic

1 TBS thyme

1/4 cup seaweed

1/2 TSP spice blend

1 TSP lime juice

1 cup water

1 habanero pepper (optional)

salt to taste

Method – Heat oil in pot/pan then add onions/scallions, tomato, and garlic.

ackee1

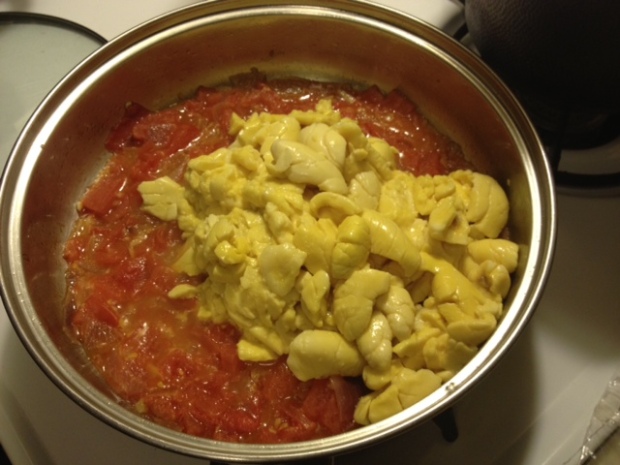
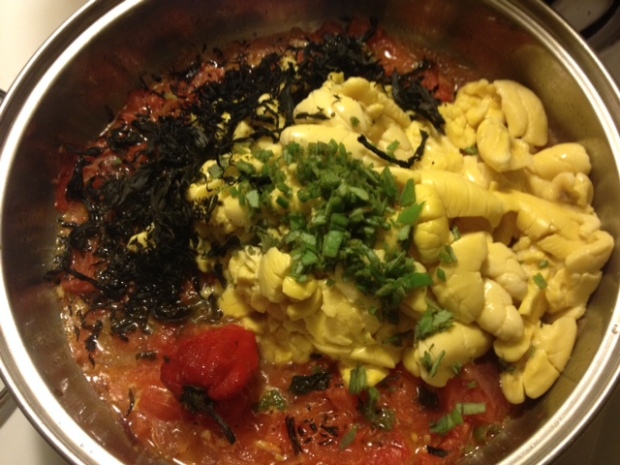
Once the tomatoes “melt”, rinse the ackee then add to the pot, followed by the seaweed (I used a mix of kelp, hijiki, and wakame), thyme, and pepper.

ackee2

ackee3

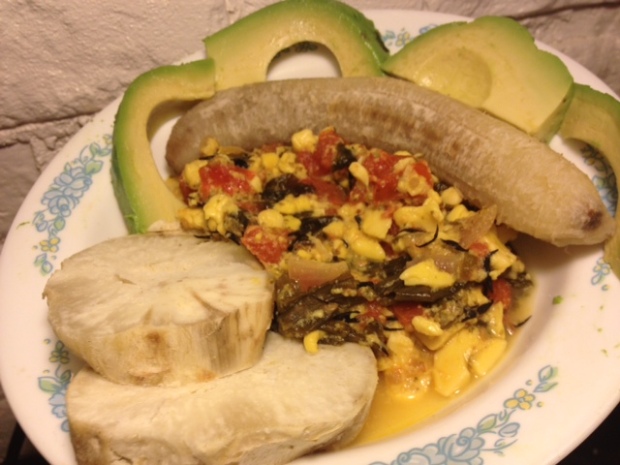
Add remaining ingredients; when it comes to boil, lower heat, simmer for 10 minutes and it’s ready.  Enjoy with cooked green bananas.

ackee4

#5 – Moi-Moi

Moi-Moi is one of Nigeria’s most popular dishes and after finally making it I can see why.  I say finally because I bought it’s main ingredient, bean flour, several months ago after getting motivated to give it a try.

bflour

However, sometime between ringing it up at the cash register and when I intended to make it, the motivation departed and it was just sitting in my cupboard since then.  This happens often with me; just one of my unique idiosyncrasies I suppose.  If I remember correctly it was likely the time involved in making it which dissuaded me – one hour cooking time + prep time – along with a loss of appetite for West Africa eats.

Well the motivation returned a few days ago and I wound up wishing that it did sooner because the end product was delicious… delicious while also being unusual made me feel quite inclined to share it with friends so after the small piece I took to confirm how it tasted, I decided to take the rest to a potluck.  Like the sauerkraut though (https://worldveganizer.wordpress.com/2014/10/05/3-sauerkraut/), there were some people at the potluck whom prejudged and kept their distance from it… this time not because of the reputed taste, but rather appearance and unfamiliarity.  Yet also like the sauerkraut, I wasn’t really upset about this because it just equated to more for me.  I only wish I had some fried plantains to go with it on the side… but that just serves as a reason to make it again soon.  Here is how:

Ingredients:

1 cup bean flour

1 cup vegetable broth

1/2 cup red pepper

1/2 cup onion

2 TBS seaweed (I used dulse)

1/4 cup coconut oil

1 TBS hot pepper

1 TBS sea salt

Prep time couldn’t be easier; starting with liquids & ending with flour, toss everything into a blender and run until it is all mixed well (20 seconds to 1 minute depending on how strong your blender is).  It could be more difficult though – using the bean flour is a major shortcut in making this.  The long version requires soaking and skinning black-eye peas instead of the flour.  I may try this method one day also just so I can compare tastes.  To add some varying texture to the mix people sometimes add hard boiled eggs, corned beef, tuna, or shrimp after getting it out of the blender but since I don’t eat any of these my equivalent was to toss in a chopped gluten sausage.

The way to cook it is via steaming.  I used my bamboo steamer on top of a regular pot.

steamer

The one hour cook time of doing so is if you are using single serving size containers.  I however used an 8 inch cake pan so the cook time was just about doubled… luckily I didn’t really have any other plans afterwards that day but lesson learned.  If you don’t have a an actual steamer of some kind you can improvise by making some sort of “stand” to put in a regular pot and place the container(s) of moi-moi on top of it.  A few crumpled pieces of aluminum foil might be one of the easiest ways to do this.  You will need to make sure you have some on hand anyway because the containers must be covered so no water gets in.  Here is the outcome:

moi moi

moislice

#4 – Fruit Fascination: Paw-Paw

I showed some gratitude to my mother in a previous post so I can’t let too much time pass without doing the same for my father because as a team I think they did a decent job with escorting me into adulthood.  In thinking about “back in the day” to the present, daddy always kept himself in pretty good condition… not the best by far, but still considerably better than many of not only his peers, but mine as well when he was their age.  Every so often there would be a person who would confirm this, asking him what his secret was and one of the main responses I remember he would (and probably still does) give them is “I eat a lot of fruits”.  In terms of amount, “a lot” = making sure our fruit basket was filled about twice per month, however “a lot” also regarded variety because beyond the selection one may find at the average Mid-Atlantic supermarket, being from the Caribbean there would often be a need to have fruits grown in a tropical habitat (besides bananas) for a nostalgia fix and daddy wouldn’t mind the slight inconvenience to get it.

It can be said that I not only inherited all this, but thanks to also getting influenced from fellow vegans, I have at least tripled it – I now regularly buy fruits by the case, order exotic ones through the mail a few times per year I either can’t find locally or have never tried, and I have driven up to about 2 hours away to get something special.  The most recent something special I got was paw-paws.

pawpaws

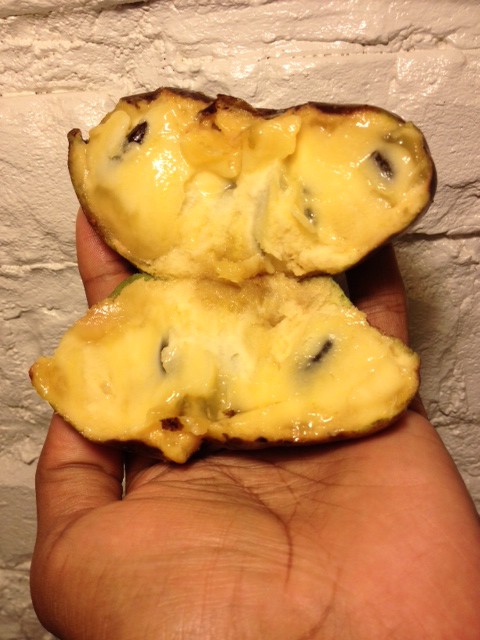
These in the photo are all fully ripe, but when you get them before this stage they would be totally green.  Anyone not familiar may mistake it for a mango but they look rather different on the inside.

pawpaw

It has about 10 fingernail size seeds in it versus a mango which has one big seed.  At $5.00 per pound, I can imagine many people being discouraged from getting any, but whereas they are only available for about one month per year, locally grown & originated, and one of the most delicious fruits in existence (in my opinion) I think it is worth a little splurging.  Additionally, for me those certain fruits which are advised to wait until they get soft before eating seem have a bit of an aphrodisiac effect and this is one of them.  A brief article was written about them in the Washington Post a few days ago –    http://www.washingtonpost.com/express/wp/2014/10/03/where-to-find-pawpaws-north-americas-largest-edible-native-fruit/ – which besides word-of-mouth will hopefully assist them gain popularity because that will mean more places growing them and eventually lower prices.

The name paw-paw may be confusing for some people from the Caribbean because there in many sectors paw-paw is also a nickname for papaya which I eat often too.  Doing so along with any others fruits one can think of I can already see and feel the effects of following my father’s footsteps.

#3 – Sauerkraut

There are a few foods that I have become more open to ever since becoming vegan and sauerkraut is one of them.  To assist the development of my kitchen skills I took a class a few years ago where among other things we were taught how to make it and I then learned that what I disliked about sauerkraut wasn’t the dish as a whole, but rather the certain spice commonly used in it in Germany and other European countries where making it is like second nature.  That spice is caraway (also commonly used in rye bread and which thus is also not on my list of favourite eats) and now omitting it from my mix, I find the dish to be quite yummy.

I think when most people hear the word “pickle” their first thoughts are of cucumbers but “pickle” is also a verb.  So, “pickles” are pickled cucumbers and sauerkraut is pickled cabbage; whereas they are made the same way, their taste isn’t that much different.  Also because of how they are made, they both have health benefits mostly in the form of assisting digestion.

There are 3 general ways of pickling – brine method (water + salt), vinegar method, or self-contained juice extraction method.  This recipe is for the latter-most:

2 pounds shredded cabbage (if you don’t already have one, a food processor would be a good investment for this, otherwise you will be doing alot of chopping and/or grating).

4 garlic cloves diced

1 apple peeled and shredded

1 TBS sea salt

Toss everything into a bowl and mix well.  The salt will induce the juice extraction but to speed up the process squeeze the mixture in your hand for a few minutes.  Squeeze it very hard too with all your wrist strength.  Once you start to see juices flow out your hand when you squeeze it is ready to go into the pickling vessel which can be just about any ceramic, glass, or plastic (recommended in that order) container.  I used my crockpot.  After putting the mix into it, it needs to be double-covered – one cover to make sure the mixture remains submerged in it’s fluid and another to keep fruit flies out.  For the first cover, some sort of weight is usually used.  My method was to take 2 gallon size ziplock bags, place one on the mixture and fill the other with rice and put that on top.

photo 1 (1)

(forgot to get photo with the rice in there; oops)

coverpot

The 2nd cover can be just whatever lid the container came with.  Now just put it somewhere for one week and then it’s ready.  If your container is not opaque, make sure the somewhere you put it is dark.  Here is the final look:

photo 2 (2)

Place into jars and refrigerate.  I took this batch to a potluck recently and some of the attendees weren’t as willing to try it; I think also because of the caraway issue because I got compliments on it from everyone who did.


#2 – Basic Bread Loaf

I’m sure there will be very few days in the future when I do 2 posts in one day but today is a special occassion so I thought I’d make the effort to do so, and in keeping with that specialness, my first food display will be one taught to me by my mother.  Before she did I had seen photos and read recipes on how to make bread but it always seemed like to be successful at it required hands-on training for me due to the feel of the dough needing to be a certain way for the end result to turn out right.  The traditional Trinidadian version (where the parents are from) calls for dairy milk, butter, and sometimes eggs thrown into the mix but here is my veganized version:

All ingredient amounts are approximate; I’m not a measuring cup/spoon user:

4 cups bread or unbleached all-purpose flour

2 cups lukewarm water

1/2 cup coconut oil

1/4 cup raw sugar

1 TBS sea salt

1 TSP yeast

Directions – mix sea salt into flour then add oil and mix again.  In separate bowl stir sugar and yeast into lukewarm water until dissolved.  When water starts to bubble add to flour, mix and knead into soft dough then allow to rise which may take 2 – 4 hours.  After it has risen punch it down, reknead, and separate into 2 loafs.  Place in loaf pans (or you can freeze one for later) and allow to raise again one more hour.  This is how mine looked at this point:

unbread

Bake at 350F for 15 – 20 minutes or until light brown.  Here is the final product:

donebread

Be sure to take it out of the bread pan when you get it from the oven or else it may sweat.  Also for a creamy flavour you can use almond milk instead of or in addition to the water when mixing.


#1 – A Gift to…

From 2009 – 2013 I had a blog on ning.com in which I did a monthly post on veganism.  Today is the anniversary of my leaving my mother’s womb and as a gift to myself I decided to reestablish the blog here.  It happens to also be http://worldvegetarianday.org/ so it seems fitting.

WVDhome_msthd

At least one way I plan to have the blog be “new & improved” from how it was before is to actually alert people of it’s existence beyond those who happened to be in that ning community or anyone that may have stumbled upon it via whatever other means.  The number of people I know who are having health problems which I think vegan insight may be helpful seems to be increasing and in this sense I’m hoping it can be a gift to them as well.